
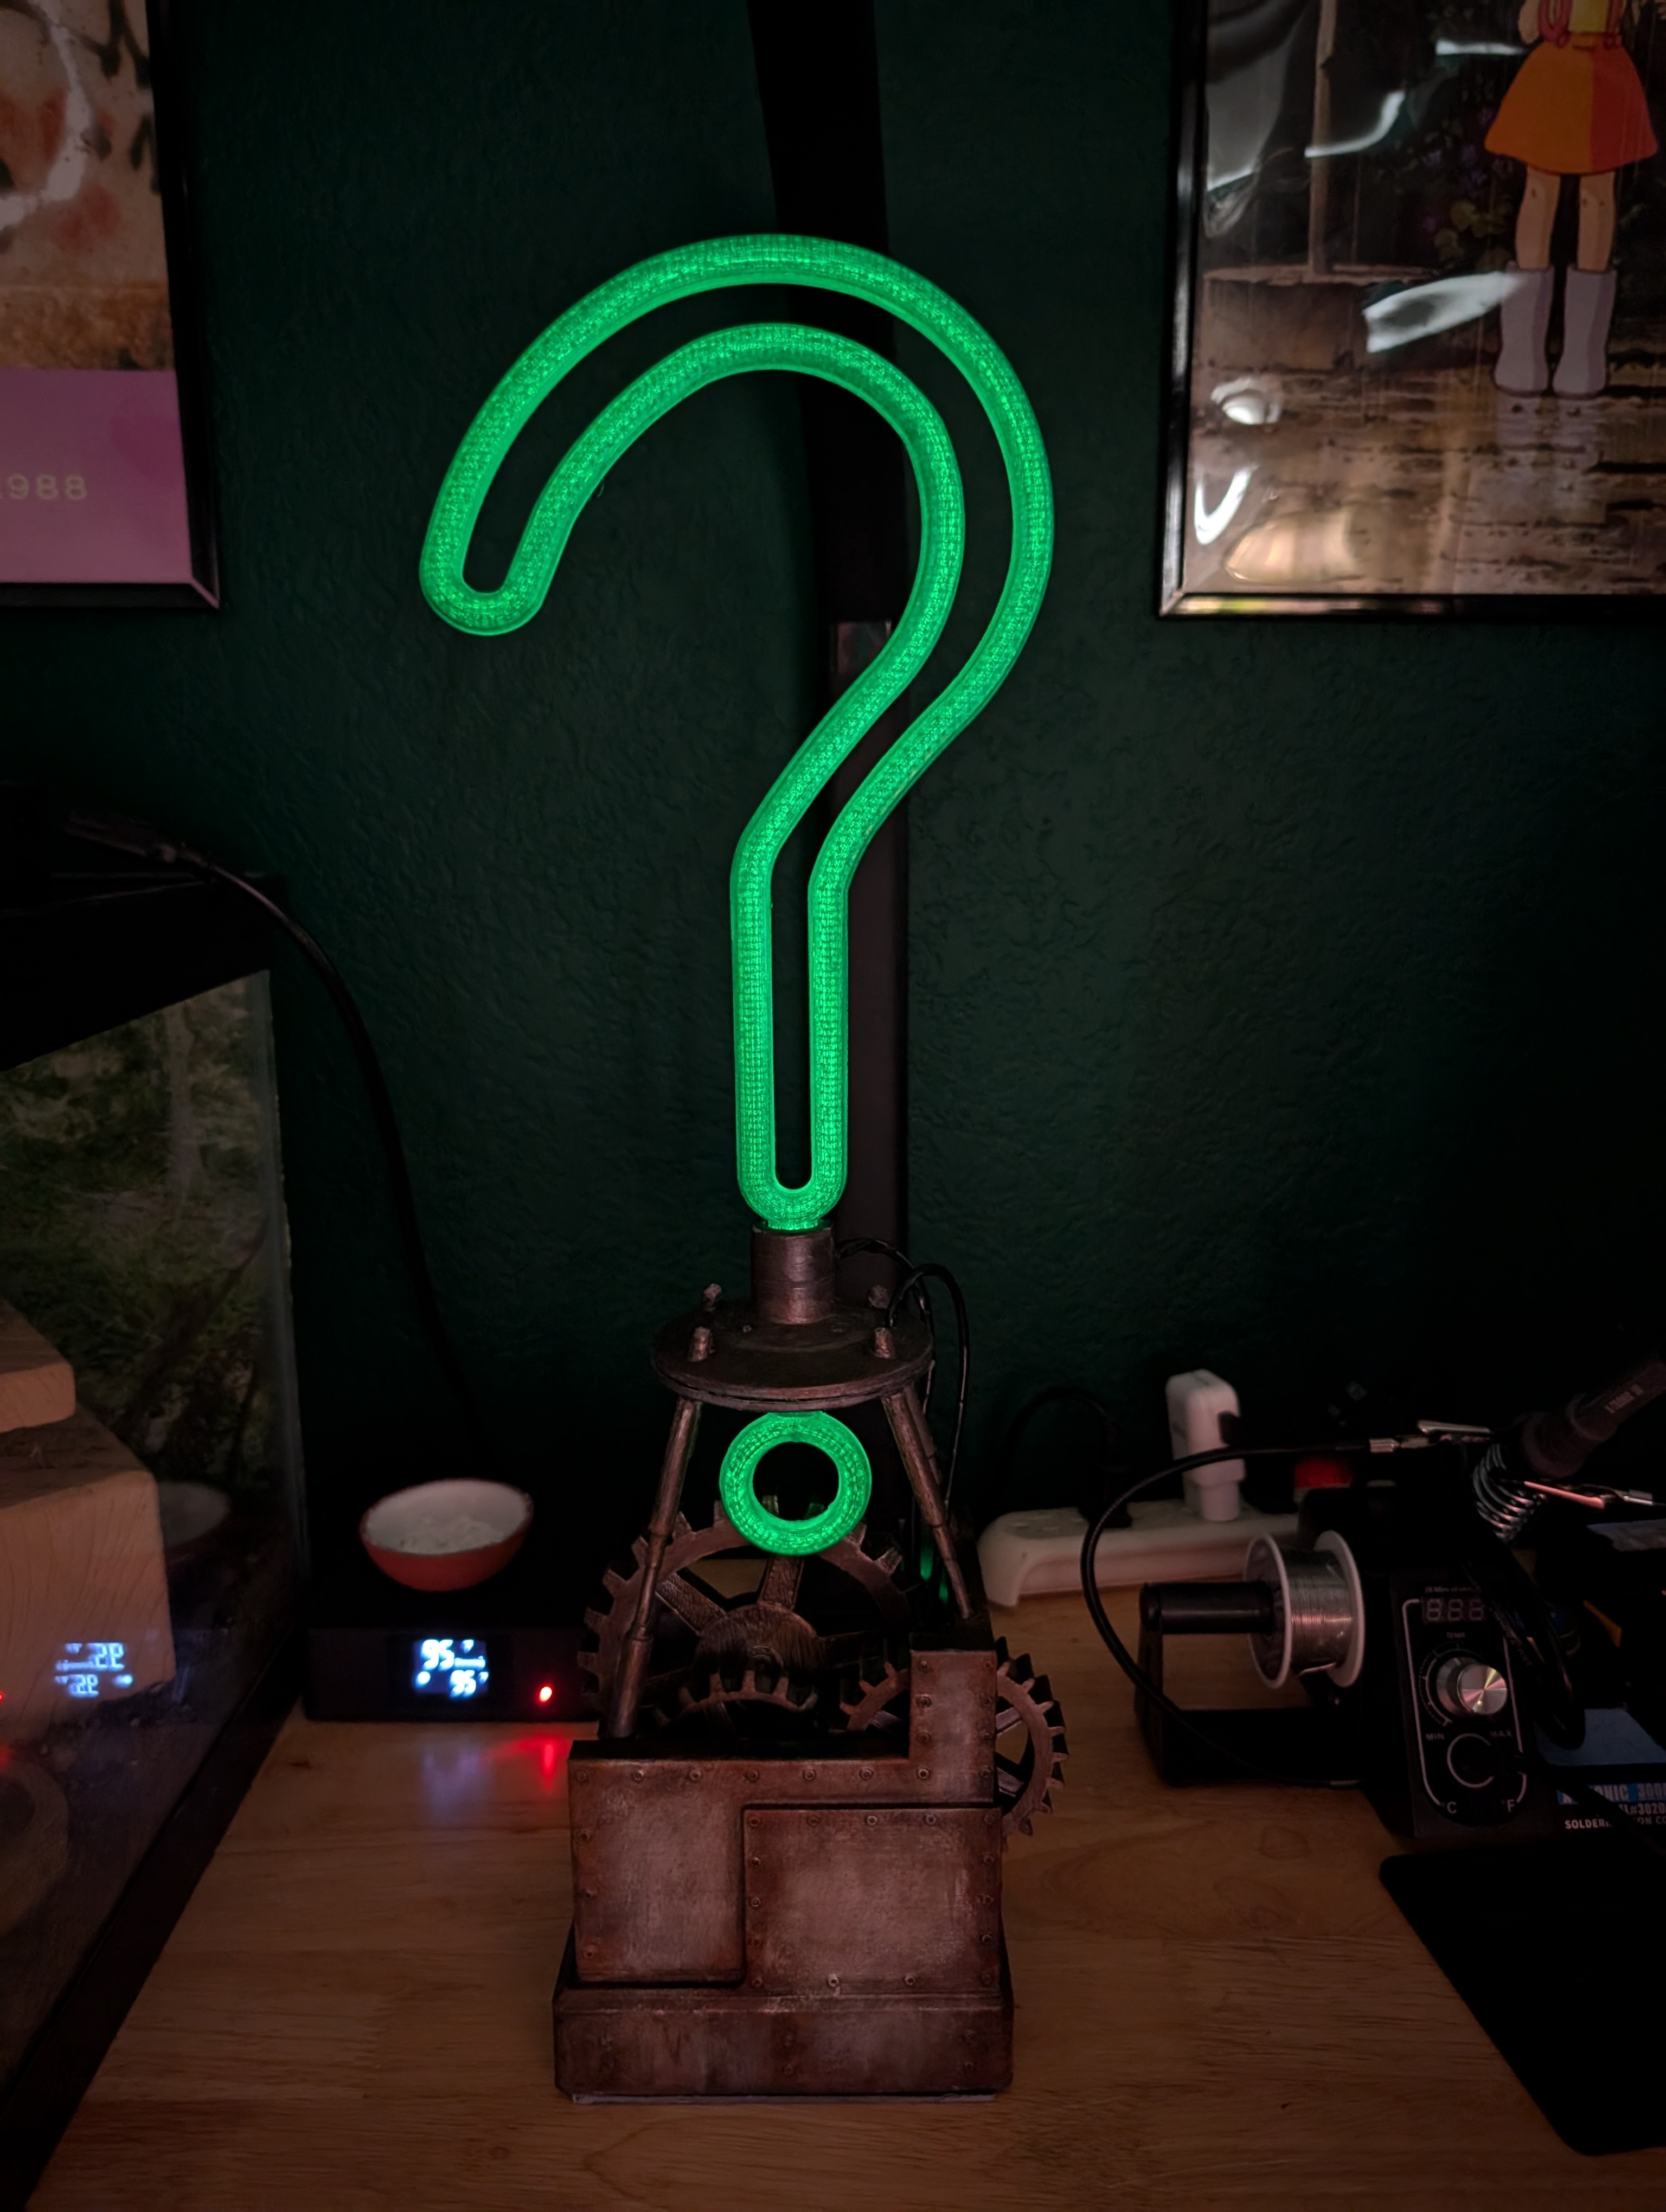
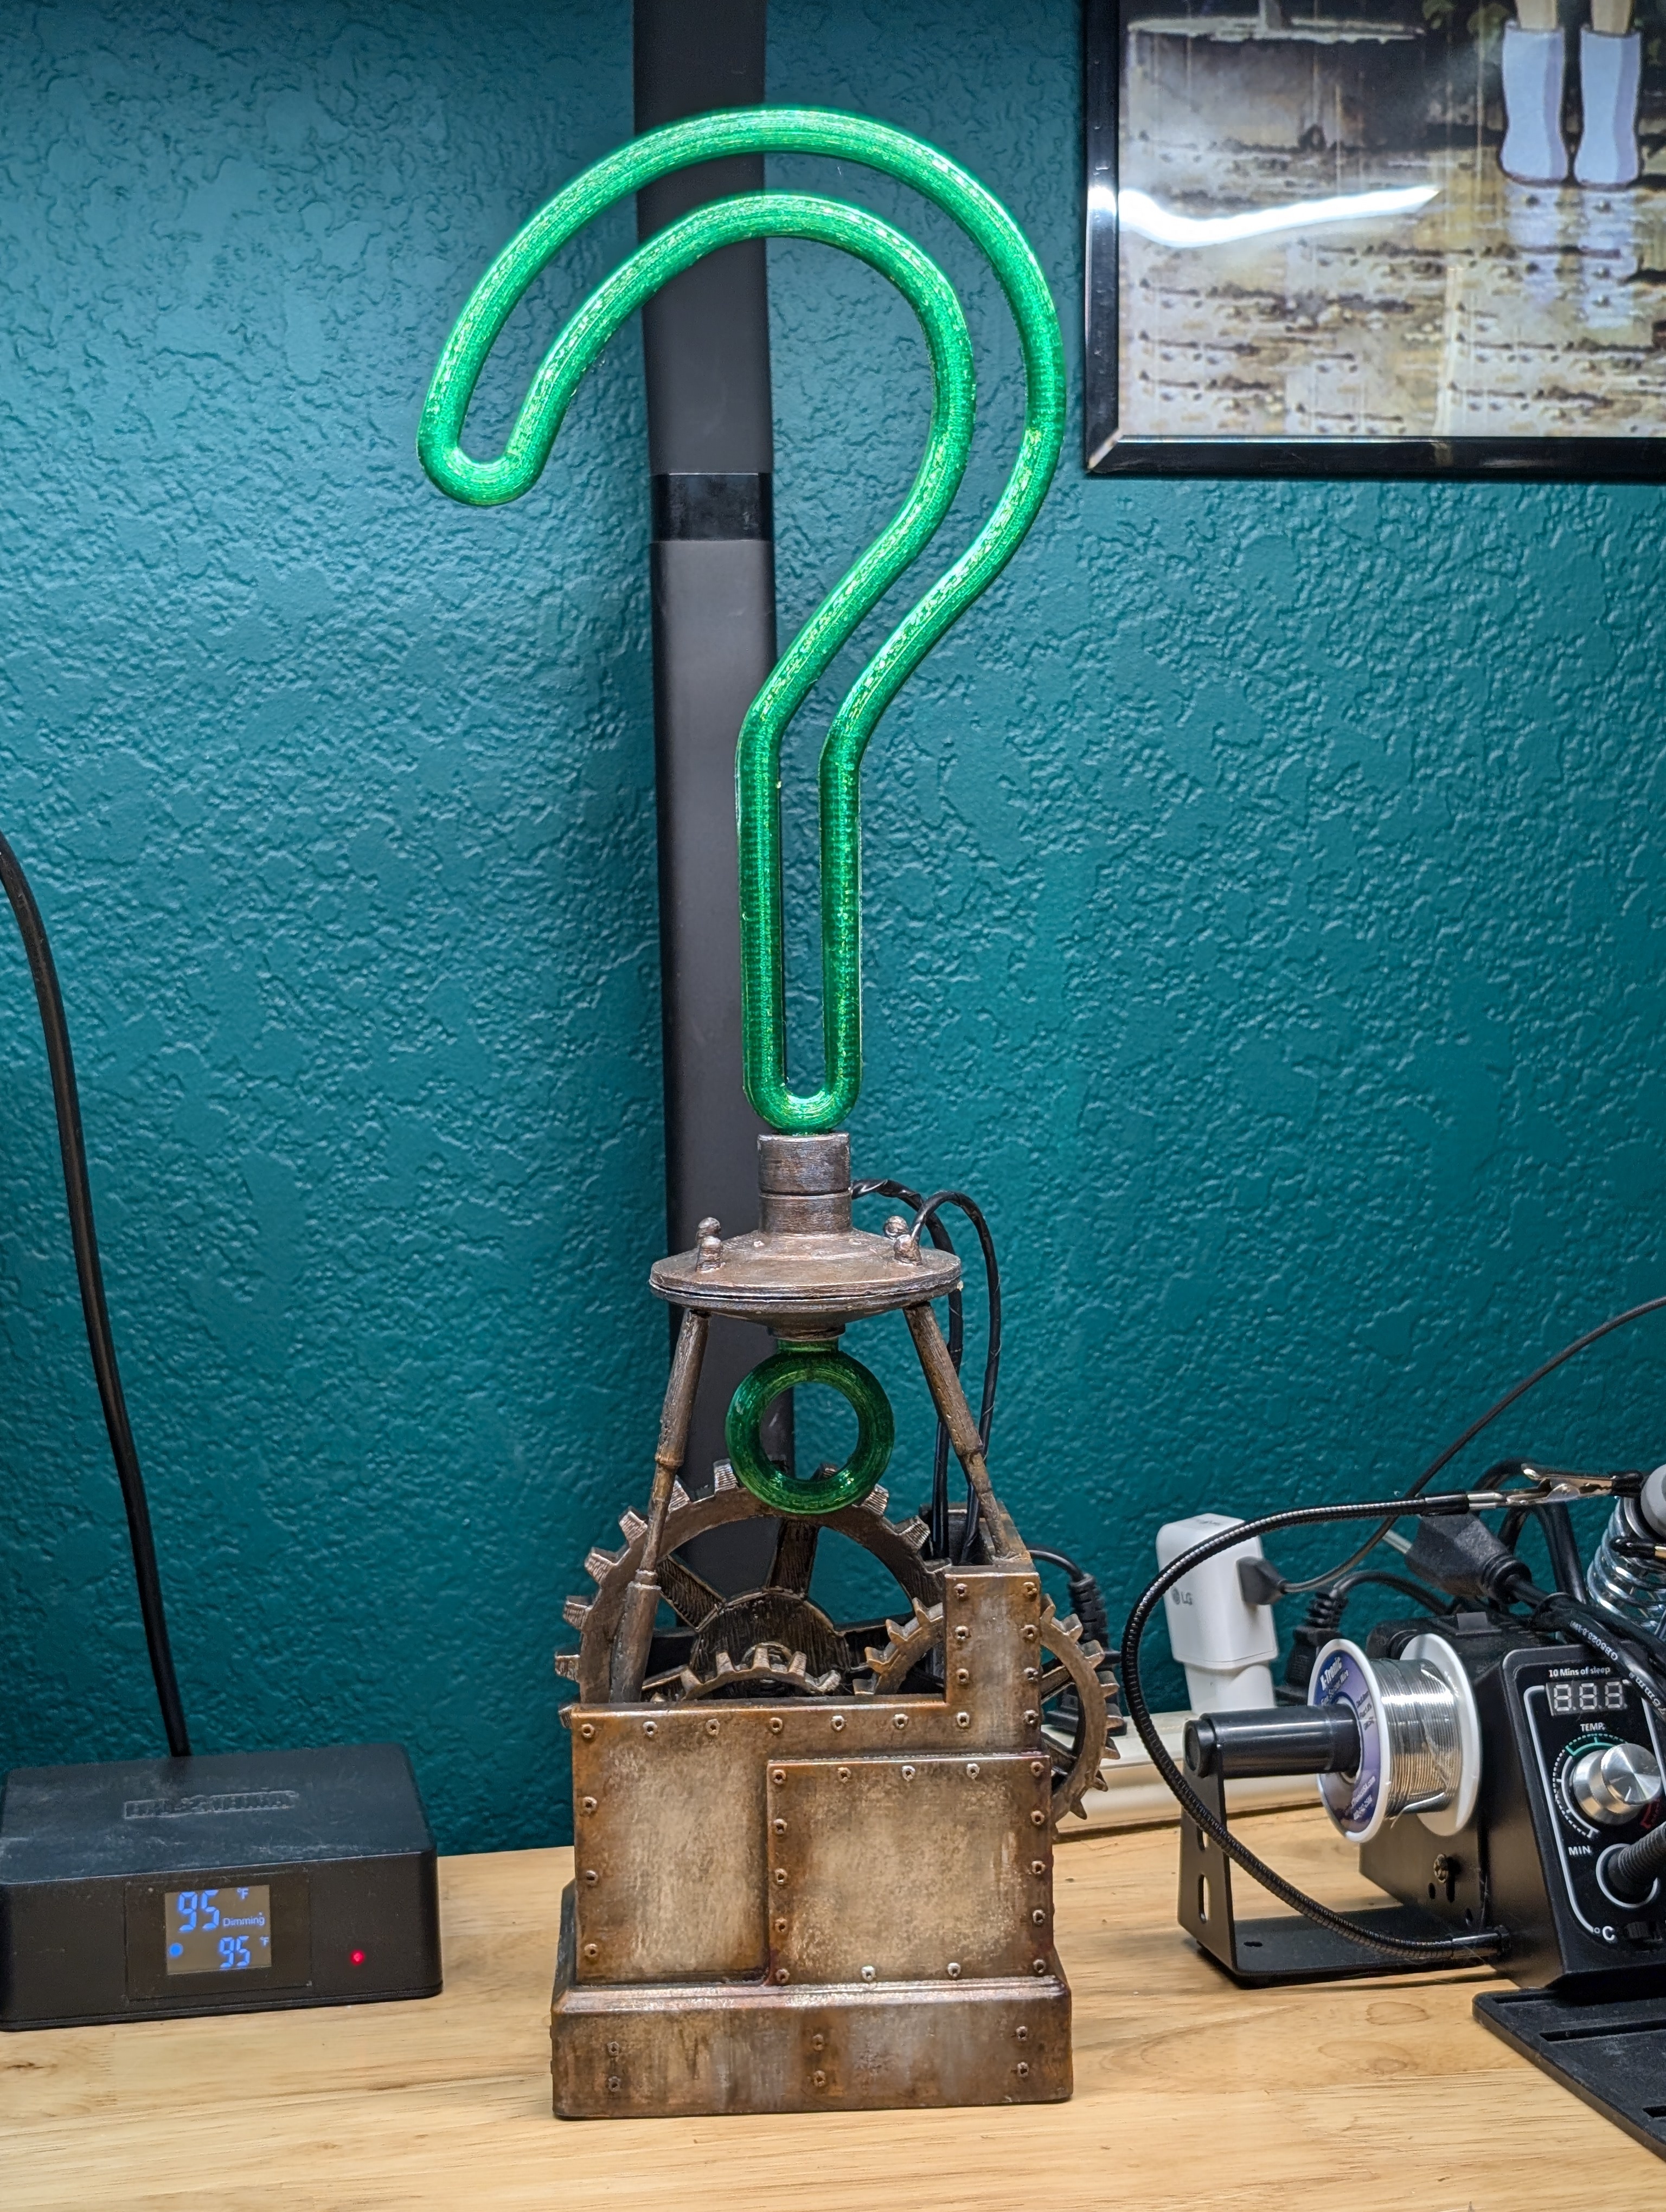
Really happy with how it turned out! Decided to show it off to strangers for now as I haven’t given it to him yet and i know he isn’t on here. 😆. And it lights up!
This is the sickest shit! What an amazing sibling. I can’t wait until we can get back to 3D printing. Do you have a brand of primer you prefer?
Not sure id say “prefer” as i don’t have experience with many others, but i used rustoleum sand and fill primer from amazon
Here it is lit up!
IT LIGHTS UP???
Hell ya it do!
How’d you pull that off? The question mark looks like filament, not like a neon tube.
Its translucent green filament with green EL wire run through it, with the battery pack stored in the base.
That’s dope as fuck
Are the gears plastic, or are they real gears that turn?
Printed plastic, but I’m glad my paint job made you question! I do wish the gears turned, but the model designer was trying to emulate what he saw in the game, which didn’t seem to care about real functional parts, haha
OMG that’s so cool!
Just realized i should probably share the STL link in case anyone wants to make their own: https://www.thingiverse.com/thing:4245103
Got a picture of it lit up?Looks great! Just saw your commentI messed around with my brother’s new resin printer (Phrozen Mega 4K) this past spring and I made myself an Arkham batarang that could fold.
Are we being denied a picture of it lighting up?!
Apologies, the issue has been rectified 🙂
Looks even better lit up like that!
Thanks! I do wish the EL wire was a bit brighter, but when the lights are all off it looks great!
Looks amazing! Bonus points for making it light up. He’s going to love it!
Thank you! I have high hopes 😉
Why so riddlous?
*beatboxes*Best brother.
Haha, thanks! He’s a fellow gamer, so i get to work on cool 3D printing projects without clogging up my living space with knick knacks. 😆
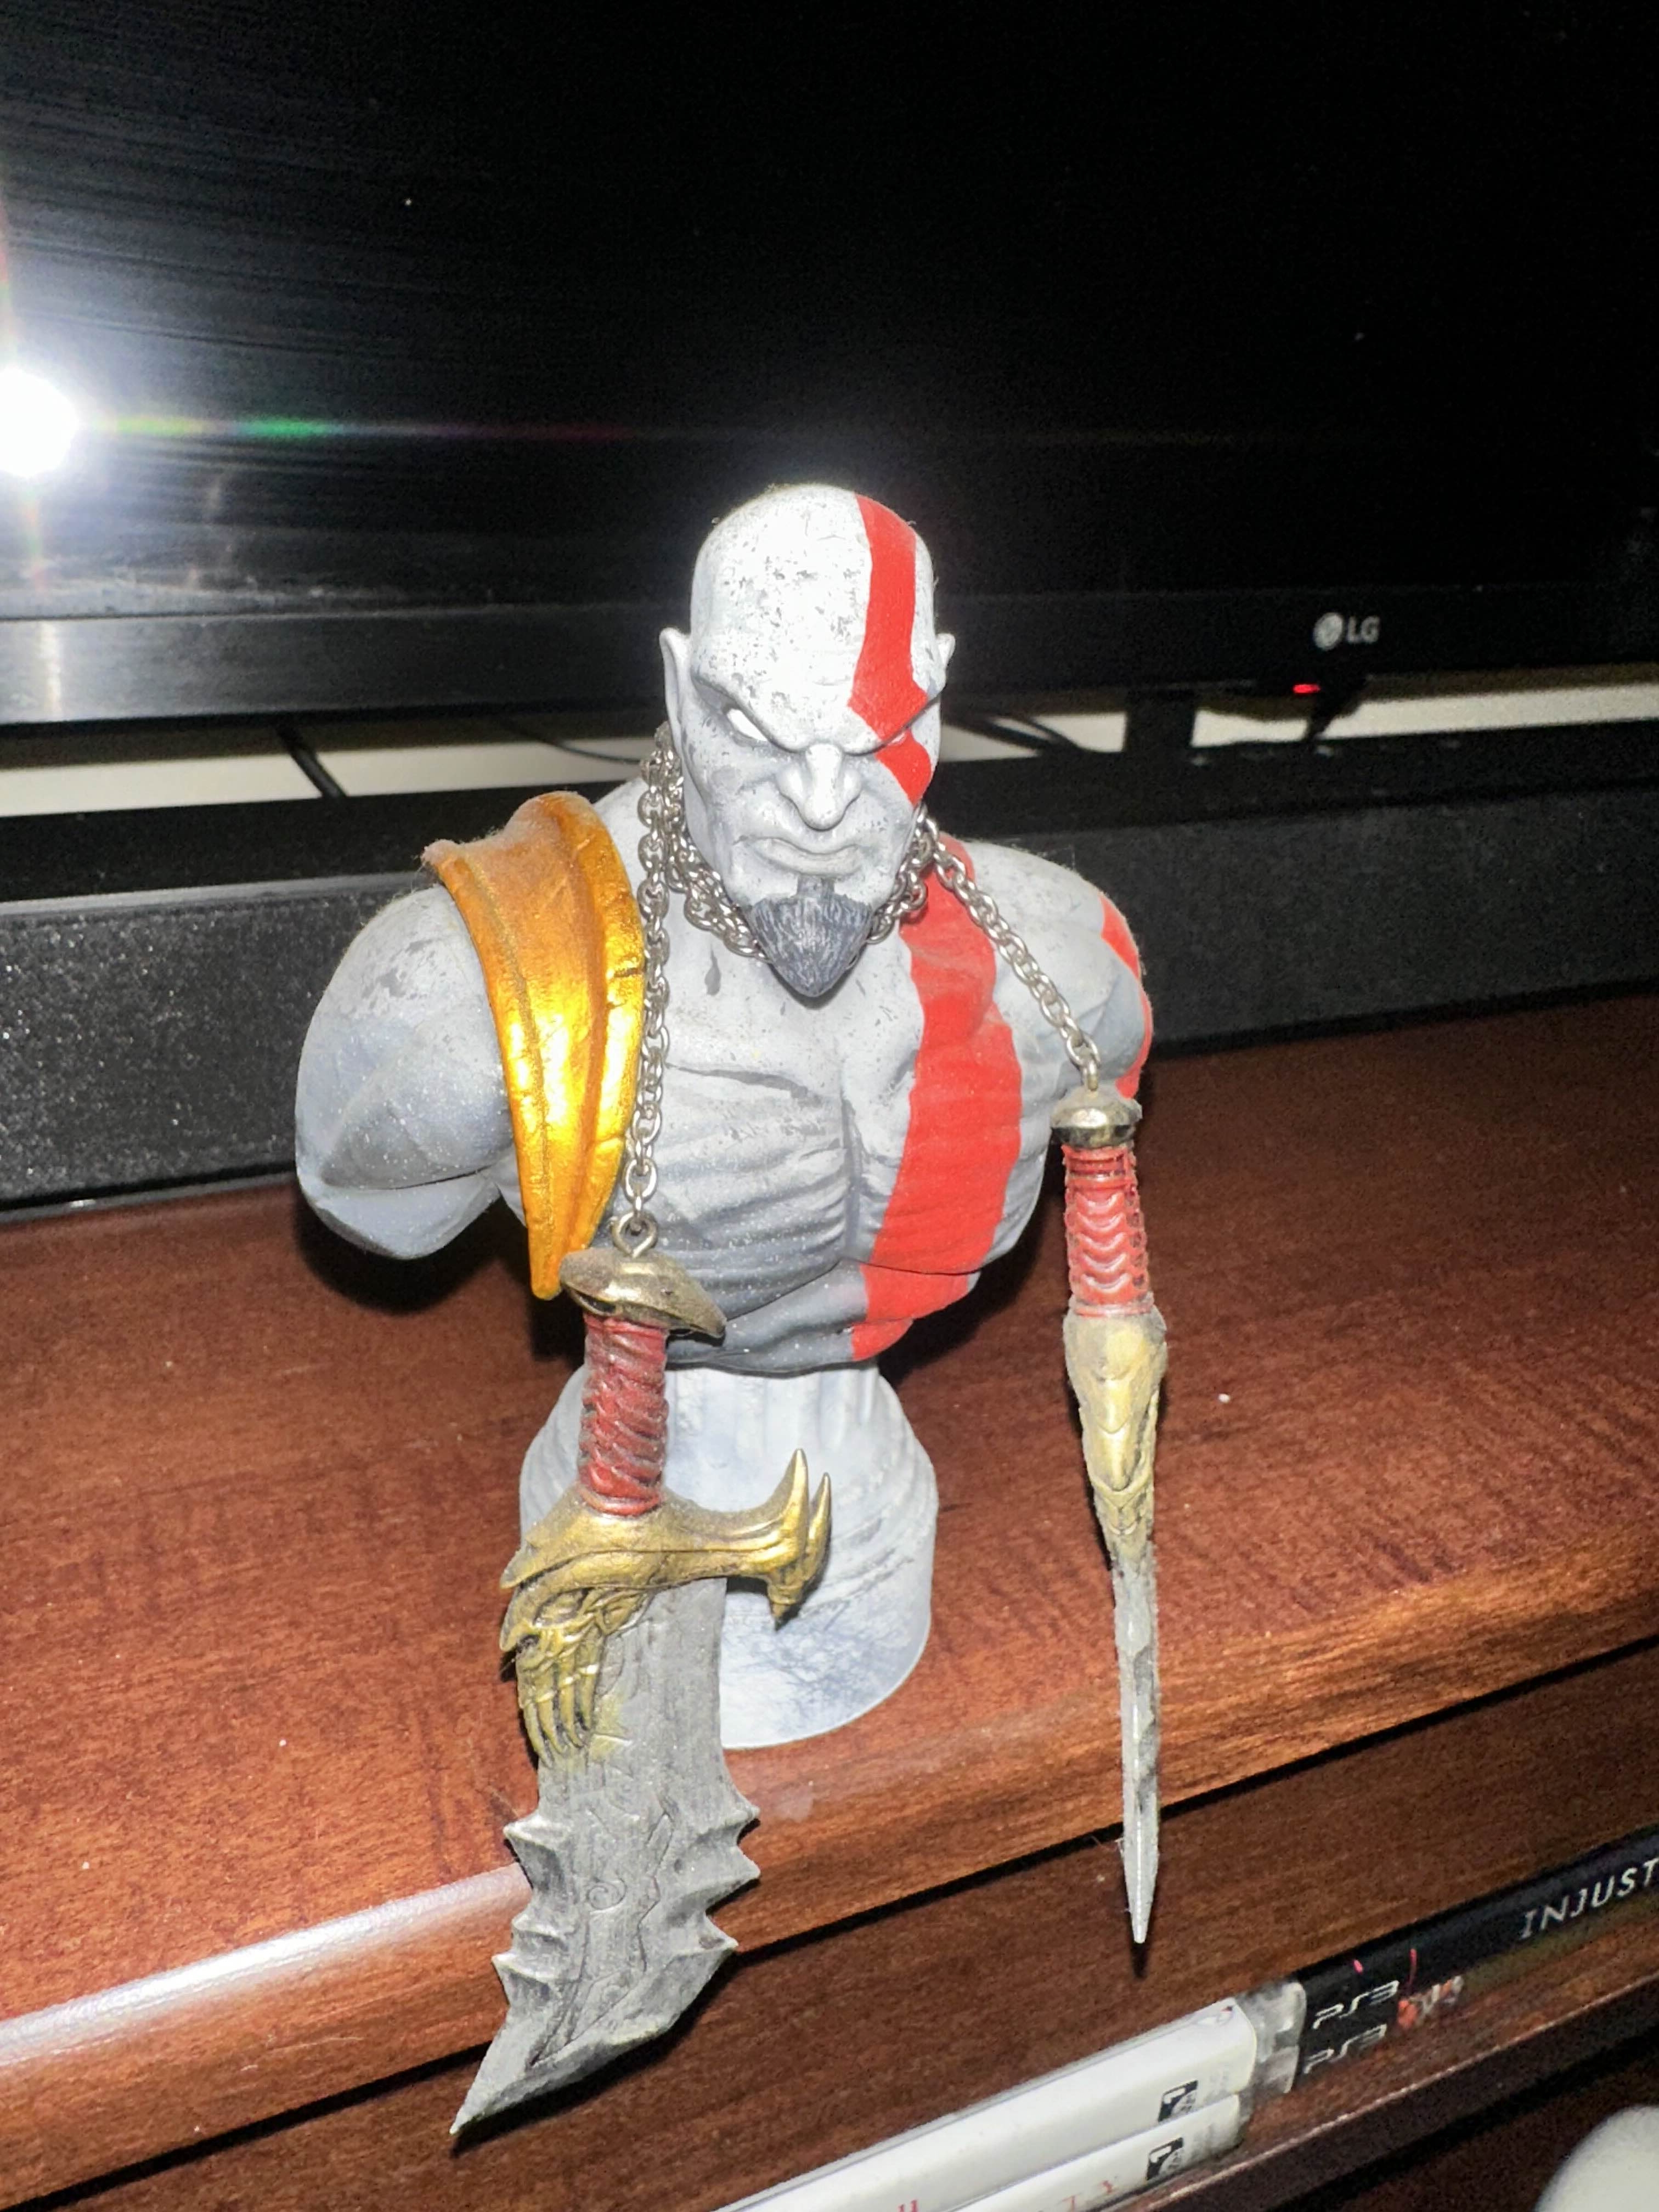
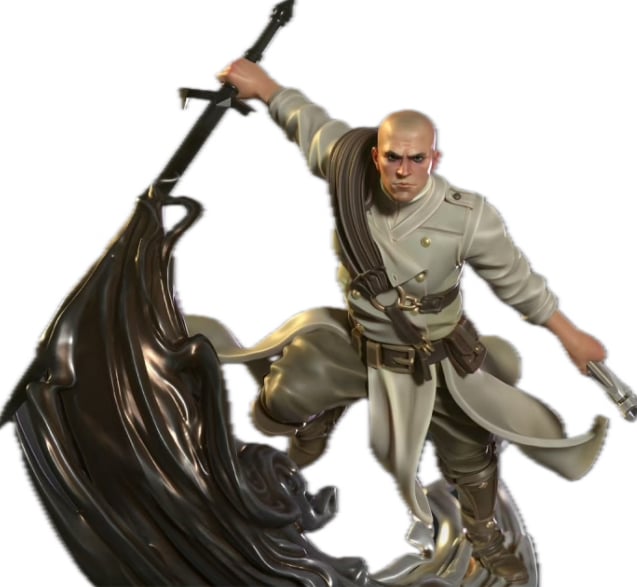
I printed/painted this for him a couple years ago (sorry for potato quality photo):
Out of curiosity, what is your painting setup/process? Nice work!
Thanks!!!
Here’s a quick rundown:
- printed all parts in PETG
- Sprayed all parts with multiple liberal coats of sand and fill primer
- sanded things down with disposable nail files (wasnt too finicky, mostly wanted to smooth the box part and get rid of some bad layer lines on the posts)
- wiped everything down to get rid of the dust (i sanded only a few hours after spraying, so there was hardly any dust anyway, but just to be sure
- based coated all parts in metallic gunmetal (sans “neon”)
- heavy metallic silver dry brush over most everything
- assembled it
- dry brush stippled dark rust around most the rivets/edges, and anywhere grime would settle (way easier to tell where that would be when its full assembled)
- Dry brush stippled bright orange rust color over top of the brown areas where corrosion would be worst
- came back through with light silver dry brush in non corroded area (i got a little overzealous with the dark rust color)
- used a homemade oil wash (black and burnt ochre oil paints mixed with some mineral spirits) over top of all the gears, and ran a heavily loaded brush along the top edges and over rivet, letting the wash drip dpwn the sides.
- after it dried for 5-10 minutes, i used an old frayed brush to lightly drag the wash down to make the big drips look for natural
- After i was done, I realized i overdid it a bit again, and went back through with some mineral spirits and cotton swabs to re-expose some of the “bare metal” in the centers of the panels. I love oil washes! You have a ridiculous amount of time to manipulate the paint before it dries up, and looks terrific after it’s dry.
And there you have it!
Thanks for sharing!
Fosho
Right. It looks so smooth.
Are you going to hide it behind a cage with an elaborate hidden way to get to it?
It crossed my mind, and i want to SO BAD, but unfortunately i don’t have enough time to print out something large enough to house it. But maybe for Christmas! Lol
Some of those trophies were just so aggravating
1000%
Really well done! Please post a pic with light on
Thanks, done!


